Placeholder Content Image

“Completely tacky”: Bride slammed for asking for dinner payment

<p dir="ltr">A bride has caused a stir online after asking if it is appropriate to ask her wedding guests to pay for their meal when they RSVP to the big day. </p> <p dir="ltr">The woman took to a popular wedding Facebook page to ask the opinions of other brides, sharing an example of her invitation created by her wedding planner. </p> <p dir="ltr">The invitation asks guests to confirm whether or not they will be attending the nuptials, before asking if the guest intends to eat at the wedding ceremony, and which meal they would prefer. </p> <p dir="ltr">The price of each meal was also included: $20 for grilled chicken with rice, mashed potatoes and green beans and $25 for a salmon alternative.</p> <p dir="ltr">“We invite you to eat with us but ask for you to provide your own payment. Please select which meal you'd prefer,” the invite stated. </p> <p dir="ltr">“My wedding venue requires me to purchase food through them for the reception, but has said people sometimes choose this option,” the woman wrote on Facebook. </p> <p dir="ltr">“Nothing about my reception is very typical anyway, SO I'm wondering how insane or rude or cost-effective/smart this is.”</p> <p dir="ltr">“The planner set me this as an example of how to present it to guests.”</p> <p dir="ltr">But when the post was quickly criticised by others, the bride clarified the event was more of a “fun dinner party” rather than a “wedding” as she and her partner had already legally married five months prior. </p> <p dir="ltr">“Ultimately I'll do what I want BUT I did not choose this option. It was only a suggestion from the venue that I was curious about others' opinions on,” she added. </p> <p dir="ltr">“This is for the reception. I'm most definitely not asking for money or gifts and by the time they come to the reception, we will have already been married for five months.”</p> <p dir="ltr">The post was shared in another wedding shaming Facebook group and critiqued by dozens of wedding experts.</p> <p dir="ltr">“Oh hell no! This is completely tacky!” one wrote, another said, “So she asks if it is rude then gets offended when people say it's rude?”</p> <p dir="ltr">“I am a veteran pro planner and would NEVER suggest this!” another said. </p> <p dir="ltr">Someone else wrote, “I'm especially shaming the venue for suggesting that people often pawn off the cost of dinner to their guests. Encouraging rude behaviour.”</p> <p dir="ltr"><em>Image credits: Getty Images / Facebook</em></p>

Food & Wine

Placeholder Content Image

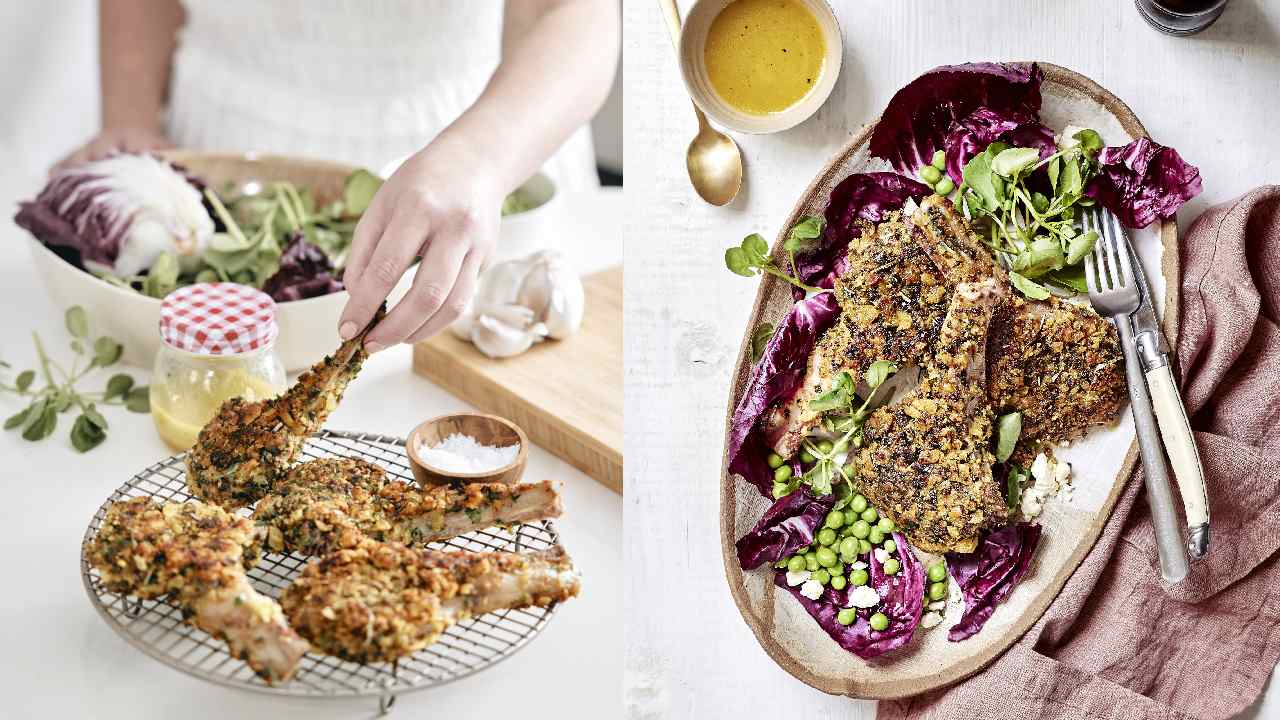
This is the healthiest time to eat dinner

<p><strong>When should we eat dinner?</strong></p> <p>Recent research highlights that the timing of our meals, particularly the last meal of the day, can significantly affect our health. The story is not merely about what we consume, but also about when we do so.</p> <p>The debate about dinner timing finds substantial scientific backing with a Brigham and Women’s Hospital (BWH) study published in Cell Metabolism in October 2022, suggesting that early dinners could have more health benefits than previously believed.</p> <p><strong>The science of early dinner</strong></p> <p>Senior author of the study, Dr Frank A. J. L. Scheer, Director of the Medical Chronobiology Programme in BWH’s Division of Sleep and Circadian Disorders, explained the study’s objective in a press release: “We wanted to test the mechanisms that may explain why late eating increases obesity risk.”</p> 
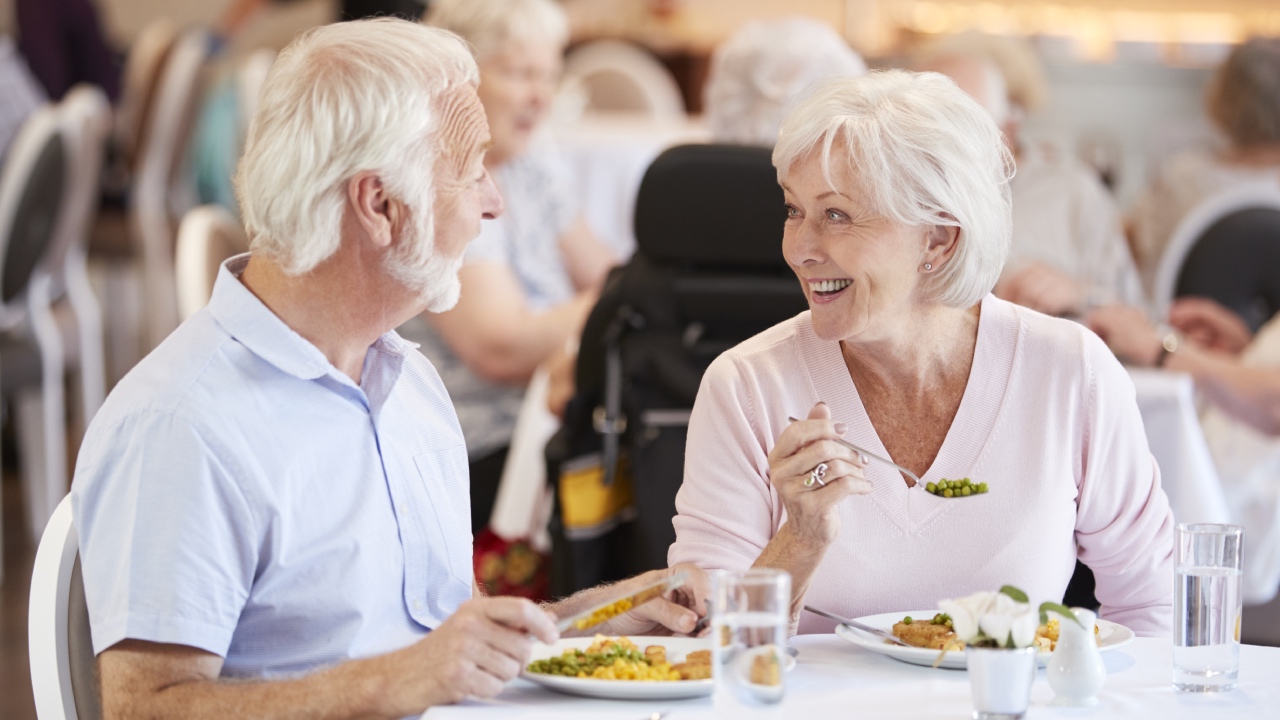
<p>The study defined an early dinner as a meal consumed three to four hours before bedtime, aligning with our body’s circadian rhythm. This time management allows the body to efficiently digest food, process nutrients, and smoothly transition into a fasting mode during sleep, facilitating essential restorative processes (and arguably better sleep, according to some experts).</p> <p><strong>The benefits of an early-bird dinner</strong></p> <p>The BWH study discovered stark differences in metabolic profiles of early and late diners. Early diners demonstrated lower blood glucose levels, improved fat-burning capacity, better sleep quality, and higher energy levels. Meanwhile, late dinners led to increased hunger, slower calorie burning, and elevated fat storage, posing risks for conditions like diabetes and cardiovascular disease.</p> <p>Further reinforcing these findings, a study published in Obesity Reviews examined the effects of energy intake distribution on weight loss. This systematic review evaluated nine randomised controlled trials and concluded that focusing on earlier energy intake resulted in significantly greater short-term weight loss. Alongside weight loss, improvements were observed in insulin resistance, fasting glucose and LDL cholesterol levels.</p> <p><strong>Implications and recommendations </strong></p> <p>These findings hold considerable implications for those dealing with health conditions like diabetes, thyroid issues, polycystic ovarian disease, and cardiovascular disorders. The studies spotlight the importance of early and light dinners, thus prompting a re-evaluation of our dinner schedules and meal planning.</p> <p>As first author Dr Nina Vujovic put it: “Does the time that we eat matter when everything else is kept consistent? And we found that eating four hours later makes a significant difference for our hunger levels, the way we burn calories after we eat, and the way we store fat.”</p> <p><strong>Tailoring dinner time to fit your schedule </strong></p> <p>The exact timing of dinner isn’t a one-size-fits-all scenario, as people’s routines vary widely. Nutritionist Maya Feller emphasises that our schedules – ranging from traditional nine-to-five to round-the-clock – are pivotal when considering “ideal” meal times. Therefore, finding a dinner time that seamlessly fits into your schedule is essential, rather than adhering to a strict, potentially unfeasible timetable.</p> <p>Dr Wendy Bazilian offers insightful tips for those whose routines may not accommodate an early dinner. She recommends consuming meals or snacks every three to five hours. This regular eating pattern can help stabilise blood sugar levels, preventing the onset of hunger pangs and energy lulls.</p> <p>Furthermore, it’s advantageous to leave a gap of two to three hours between your last meal and bedtime. This gap ensures your body has sufficient time for most of the digestion process – letting you get adequate rest and repair during sleep.</p> <p><strong>Health benefits</strong></p> <p>The takeaway from these studies is clear: an earlier dinnertime might confer multiple health benefits, from metabolic health enhancement to improved sleep quality. It’s time to reconsider not just the contents of your plate, but also the clock.</p> <p>As research grows, it’s becoming apparent that understanding the interplay between our eating habits, their timing, and the body’s internal clock should be an integral part of our health strategies. After all, leading a healthy lifestyle isn’t solely about counting calories but also understanding when and how to fuel our bodies.</p> <p><em>Image credits: Getty Images</em></p> <p><em>This article originally appeared on <a href="https://www.readersdigest.com.au/food-home-garden/this-is-the-healthiest-time-to-eat-dinner" target="_blank" rel="noopener">Reader's Digest</a>. </em></p>

Food & Wine

Placeholder Content Image

Readers respond: What did your mum or dad make for dinner growing up that you haven't had in ages?

<p>Sometimes love and affection comes in the form of food, especially when it’s made by our parents.</p> <p>As we grow older and start our own lives we begin to miss the things we got used to as we grow up, especially the food our parents made. </p> <p>Here are some dishes our Over60 readers grew up with that they miss dearly. </p> <p><strong>Keralie Stack </strong>- Mums apple pie, lemon meringue pie. Beautiful meat and kidney pies. Roasted meat in winter cooked in the fuel stove , along with a big pot of pea and ham soup in winter, followed with damper and scones for dinner</p> <p><strong>Peter Lord</strong> - Mums meat and potato pie! I’ve made it and it’s not bad but it’s nowhere near as good as mum’s!</p> <p><strong>Lee Pavey</strong> - A big roast dinner with roast veges &amp; gravy made with the juices of the meat. </p> <p><strong>Jenny Yaun</strong> - In my young 8 years old Living in Indonesia I loved Mum's Nasi Goreng made with tin corn beef, I still make now and again. I'm Dutch/Australian</p> <p><strong>Marie Manson </strong>- Dads fabulous vege soup..</p> <p> </p> <p><strong>Dawn Holmes</strong> - Triple and onions!!! Can't say I miss it but they liked it!! But then mum was a great home cook with her baked goods and tasty soups and stews!!</p> <p><strong>Jennifer Sabatino</strong> - Shepherd’s Pie made with leftover lamb from the Sunday roast and apple sponge (apples with the sponge baked on top), baked custard, baked rice custard and bread &amp; butter pudding.</p> <p><strong>Kathy Bloor</strong> - Mince on toast. I have never made it for myself and I am 70</p> <p><strong>Keith Carter</strong> - I haven't had PLOT TOFFEE FOR 65 years. Just got the recipe from my 86 yo sister. So now thats the go.</p> <p><strong>Lorna Turner Prunes</strong> - and custard. I still cook all the foods my mum and dad cooked except for prunes and custard.</p>

Food & Wine

Placeholder Content Image

13 homemade weed killers that work

<p>Don’t want to use chemicals on your garden? You don't have to! Mix up these handy helpers in the kitchen.</p> <p><strong>1. Boiling water</strong></p> <p>Homemade treatments don’t come much cheaper than this. Put the kettle on, boil a pot of water and then pour it straight over the weeds – just make sure to avoid any surrounding plants. This works especially for small weed coming up through the cracks in pavement or in brickwork.</p> <p><strong>2. White vinegar</strong></p> <p>Is there anything white vinegar can’t do? You can use regular old kitchen vinegar or get the heavy duty stuff from gardening stores. Spray directly onto the leaves of the weeds and watch them fade away.</p> <p><strong>3. Salt</strong></p> <p>Another kitchen staple that can do double duty in the garden. You can either sprinkle rock salt or basic table salt directly around garden beds where weeds usually appear or create a 3:1 solution of water and salt to spray onto the leaves.</p> <p><strong>4. Salt &amp; vinegar</strong></p> <p>Combine the two and you’ll get even better results! Mix a cup of table salt with a litre of vinegar, then brush directly onto the leaves of the weeds. It’ll kill anything it touches, so avoid other plants.</p> <p><strong>5. Vegetable oil</strong></p> <p>For bulbous weeds, like onion weed and oxalis, you can inject vegetable oil into the ground surrounding the bulbs. The oil will coat the bulbs so they suffocate and will then rot into the soil.</p> <p><strong>6. Cornmeal</strong></p> <p>This won't kill existing weeds but is great for preventing them from sprouting in the first place. Cornmeal is a pre-emergent, meaning it stops seeds from growing, so it’s best for using around established plants.</p> <p><strong>7. Clove or citrus oil</strong></p> <p>Mix 15 to 20 drops of clove or citrus oil with a litre of water and spray or brush directly onto the leaves. This works best on small, actively growing seedlings rather than more established weeds.</p> <p><strong>8. Rubbing alcohol</strong></p> <p>Grab that bottle of rubbing alcohol out of the bathroom cabinet and mix two tablespoons with a litre of water. Pour it into a spray bottle and spray directly onto the weeds. The alcohol removes moisture so the weeds will quickly dry out and die.</p> <p><strong>9. Baking soda</strong></p> <p>Baking soda is sodium bicarbonate (essentially a salt), so increases the salinity of the ground to a point where the weeds cannot survive. Use around a teaspoon per weed to cover the entire plant, especially the stem. It’s also great for weeds in cracks.</p> <p><strong>10. Bleach</strong></p> <p>This one couldn’t be simpler. Pour undiluted bleach straight over the top of mature weeds at the hottest part of the day, then let the sun do its work. You should be able to pull the dead weeds out the next day. Plus the bleach stays in the soil and prevents new growth.</p> <p><strong>11. Newspaper</strong></p> <p>Rather than killing the weeds, you can smother them with leftover newspaper. Lay down at least four sheets (though the thicker the better) and the lack of sun means the weeds won’t be able to sprout.</p> <p><strong>12. Mulch</strong></p> <p>Another one from the smothering camp, a good layer of mulch will keep your soil moist, healthy and weed-free. It also blocks out the sunshine weeds need to grow while leaving the surrounding plants untouched.</p> <p><strong>Elbow grease</strong></p> <p>Ok, so this isn’t actually something you put on the weeds, but it’s all you really need to get rid of most of them. Roll up your sleeves, put on some gloves and get pulling. Make sure you get the roots so they don’t grow straight back.</p> <p><em>Image: Unsplash / Josue Michel</em></p>

Home & Garden

Placeholder Content Image

A guide to pairing wine and food

<p>When it comes to selecting wines for to go with your meals, there are no absolute rules – the only expert opinion that matters is your own. That said, there are definitely choices that pair better with certain dishes.<br />  <br />Pairing wines to a rich, complicated supper is not as difficult as it may seem. In fact, choosing wines to go with your winter meals can be among the most enjoyable and more relaxing stages in planning the dinner. At a minimum, you want to provide refreshment – water and wines – that flatter the meal's flavours. In many cases, a good-quality, medium-bodied red wine is a great choice with a lot of winter dishes. <br />  <br />Welcoming guests and relatives with flutes of crisp, sparkling wine always creates a nice sense of occasion, whether your hors d'oeuvres are just some biscuits and dips or a lavish selection or meat and cheeses. And if you’re thinking of serving bubbles throughout an entire meal, you might be onto something. Although a soup or shellfish starter might be its ideal partner, the sparkling's bubbly assertiveness allows it to hold its own with more robust dishes. <br /> <br />A traditional roast dinner – a popular meal choice in winter – that comes with baked vegetables, tests the liveliness of a single wine, and so often it makes sense to offer two or more that way guests can sip from whichever glass suits what they are eating.<br />  <br />A red wine made substantially from pinot noir grapes is a fine partner for the distinctive taste of dark meat, and the black cherry-like character of many pinot noirs, will evoke the yummy berry, rich sauces that are popular throughout the cooler months of the year. With the broad range of flavours in your meals, you may want to consider introducing maturity and complexity in your wines. Try either the sun-baked earthiness you find in an shiraz or a rioja, or a hint of mellow age, such as that found in many wines older than four or five years.<br />  <br />A well-crafted white wine can be a star of a winter dinner table, especially if it picks up on the citrus tones that are often present in sauces and garnishes of meals. Rich, concentrated white wines, such as a viognier or a chardonnay, with higher alcohol and a wisp of butterscotch sweetness, can enhance white meat. If the white is elegant and floral enough, it can be the perfect chaser for more herbal dishes, too.<br />  <br />With very little legwork, you can find wines like these in every price range, so once you’ve decided on your menu and before you commit to certain wines, sample a few options.</p> <p><em>Image credit: Shutterstock</em></p>

Food & Wine

Placeholder Content Image

Crumbed Lamb Cutlets with Vegemite

<p>Jazz up your lamb cutlets this Xmas with these simple yet delicious homemade breadcrumbs and my secret ingredient; vegemite, which takes the overall flavour to the next level!</p> <p>Whenever we have family or friends visiting, I turn to making lamb cutlets as they’re easy to cook with, taste delicious and my go-to little hack to help them go further is by crumbing them. I know it can be so easy to resort to pre-made or panko breadcrumbs but these homemade breadcrumbs are truly worth it. But what makes this recipe extra special is the use of vegemite. I know that may sound weird but let me put it this way for you… you would pair lamb with anchovy so why not vegemite? It’s a great anchovy replacement and has a rich depth of umami flavour that is perfectly paired with lamb. </p> <p>You can also cook these lamb cutlets three different ways: in the oven, airfryer or my favourite way, shallow fried in extra virgin olive oil – AND the best part, they take 15 mins max to prep and cook. Something we all need when welcoming family members round.</p> <p>Makes 10 - 12 cutlets Serves 4</p> <p><strong>Ingredients</strong></p> <p>Raddico, Watercress and Feta salad</p> <p>● 1 raddico</p> <p>● 1 bunch watercress</p> <p>● 2 cups peas</p> <p>● 100g feta</p> <p><span style="text-decoration: underline;">Lemon Honey Dressing</span></p> <p>● ½ cup olive oil</p> <p>● 2 tablespoons honey</p> <p>● ¼ cup lemon juice</p> <p>● 1 garlic clove finely sliced</p> <p>● Zest from 2 lemons</p> <p>● Salt and pepper</p> <p><span style="text-decoration: underline;">Vegemite toast crumb lamb cutlets</span></p> <p>● 10 - 12 lamb cutlets</p> <p>● 6 slices of white sandwich loaf</p> <p>● 1 tablespoons vegemite</p> <p>● 2 eggs</p> <p>● 1 garlic clove crushed</p> <p>● 1/2 cup flour</p> <p>● 1 teaspoon salt</p> <p>● 1 teaspoon cracked black pepper</p> <p>● ½ bunch fresh parsley roughly chopped and stalks discarded</p> <p>● ½ tablespoon fresh rosemary roughly chopped</p> <p>● Extra Virgin Olive oil</p> <p>Method -</p> <p>Raddico, Watercress and Feta salad</p> <p>1. Combine all ingredients into a large bowl. For the dressing, combine all ingredients into</p> <p>a jar and shake well. Dress the salad and sprinkle with feta.</p> <p>Vegemite toast crumb lamb cutlets</p> <p>1. Lay the bread out onto a baking tray and leave it to dry out overnight. It’s important your</p> <p>bread has been dried out as this will give you the crispiest breadcrumbs.</p> <p>2. In a shallow wide bowl, whisk your eggs and garlic together.</p> <p>3. Place several lamb cutlets at a time between two pieces of baking paper. Using the smooth side of a mallet pound the cutlets, until roughly 2cm thick throughout. This step is to ensure the lamb cooks at an even rate.</p> <p>4. Spread the vegemite onto one side of the bread. Roughly tear apart your bread and</p> <p>place into a food processor with the parsley and rosemary. Blend until the bread is</p> <p>chunky and the herbs have been mixed through. Place your breadcrumbs into a bowl.</p> <p>5. In a shallow bowl, whisk together the flour, salt and pepper. Begin with your flour, followed by the egg wash, breadcrumbs and finish with a large clean plate to place the cutlets. Take one lamb cutlet and coat both sides evenly with the flour, place into the egg wash, coat both sides evenly. Lastly, place into the breadcrumb mixture applying pressure with your hands when you flip the lamb over to ensure the breadcrumbs are evenly coated all over. Set aside and repeat with the remainder of the cutlets. Place the lamb into the fridge for 30 - 60 minutes to allow the breadcrumbs to set and bring the meat to a cold temperature.</p> <p>6. In a large frying pan, add 2 - 3cm of olive oil and bring to heat. Turn the heat down to low- medium and fry 1 - 2 pieces of lamb at a time for 3 minutes on one side and then 2.5 minutes on the other or until they are golden and crispy. Place the lamb cutlet onto a cooling rack.</p> <p>7. Enjoy with the raddico, watercress and feta salad.</p> <p><em>Image: Supplied</em></p>

Food & Wine

Placeholder Content Image

Shepherd’s pie

<p>For a hearty meal that is sure to satisfy, this family favourite Shepherd’s pie will be a hit with young and old alike.</p> <p><strong><span style="text-decoration: underline;">Serves</span>:</strong> 4</p> <p><strong><span style="text-decoration: underline;">Ingredients</span>:</strong></p> <ul> <li>1 tablespoon olive oil</li> <li>1 brown onion, diced</li> <li>2 carrot, finely diced</li> <li>500g beef mince</li> <li>2 tablespoon tomato paste</li> <li>400g can peeled tomatoes</li> <li>1 cup beef stock</li> <li>1 teaspoon Worcestershire sauce</li> <li>1 teaspoon mixed herbs</li> <li>750g potatoes, washed, peeled and chopped</li> <li>¼ cup milk</li> <li>50g butter</li> <li>Salt and pepper, to season</li> </ul> <p><strong><span style="text-decoration: underline;">Method</span>:</strong></p> <ol> <li>Preheat the oven to 180°C. Heat olive oil in a frying pan and cook onion and carrots for 5 minute or until softened. Add mince and cook for three minutes or until browned.</li> <li>Season with salt and pepper. Stir through tomato paste, tomatoes, stock, <br />Worcestershire sauce, and herbs. Cover and simmer on low for 15 minutes. Remove lid and cook for a further 10 minutes.</li> <li>Meanwhile, add potatoes in saucepan of salted water. Boil and reduce to simmer. Cook until tender. Drain well and mash with butter and milk until smooth. Season with salt and pepper to taste.</li> <li>Spread beef mixture evenly in an ovenproof baking dish. Spoon potatoes into large pastry bag fitted with star tip. Pipe rosettes over beef mixture. Place in oven and cook for 30 minutes or until topping is browned. </li> </ol> <p><em>Image: Getty</em></p>

Food & Wine

Placeholder Content Image

Pumpkin and chicken red curry

<p>If you’re feeling like Thai food tonight, but the take-out menus away and give this pumpkin and chicken curry recipe a try. We bet you’ll be converted!</p> <p><strong><span style="text-decoration: underline;">Serves:</span> </strong>4</p> <p><strong><span style="text-decoration: underline;">Ingredients:</span></strong></p> <ul> <li>1 small pumpkin, halved, peeled and cubed</li> <li>2 shallots, chopped</li> <li>3 cloves of garlic, chopped</li> <li>1 tablespoon of red curry paste</li> <li>2 tablespoons of water</li> <li>1 can of unsweetened coconut milk</li> <li>2 tablespoons of Asian fish sauce</li> <li>1 lime, juiced</li> <li>2 teaspoons of brown sugar</li> <li>3 tablespoons of peanut oil</li> <li>0.5kg of chicken breast, cut into pieces</li> <li>2 tablespoons of fresh basil</li> <li>White rice to serve</li> </ul> <p><strong><span style="text-decoration: underline;">Method</span>:</strong></p> <p>1. In a large pot of boiling water, boil pumpkin until it begins to get tender, for about seven minutes.</p> <p>2. Using a blender, blend shallots, garlic, curry paste and water until smooth.</p> <p>3. In a bowl, mix coconut milk, fish sauce, lime juice and brown sugar. Stir until dissolved.</p> <p>4. Heat two tablespoons of peanut oil in a large wok on medium heat. Add chicken, searing until lightly brown. Remove chicken from wok.</p> <p>5. Add remaining oil to wok and return to heat. Add mixed curry sauce and cook, stirring. Add coconut milk mix and bring mixture to a boil.</p> <p>6. Add pumpkin and chicken and let simmer until chicken is cooked through and pumpkin has grown tender.</p> <p>7. Garnish with basil and serve with white rice.</p> <p><em>Image: Taste</em></p>

Food & Wine

Placeholder Content Image

Sweet and sour prawns

<p>Don’t settle for takeaway when it’s so easy to whip up this delicious sweet and sour prawn dish.</p> <p><strong><span style="text-decoration: underline;">Serves</span>:</strong> 4</p> <p><strong><span style="text-decoration: underline;">Ingredients</span>:</strong></p> <ul> <li>500g raw banana prawns, peeled, deveined, heads removed</li> <li>2 carrots, sliced</li> <li>1 cup chopped red, yellow and green capsicum, cut into bite sized pieces</li> <li>½ brown onion, chopped</li> <li>1 tablespoon grated fresh root ginger</li> <li>1 red chilli, deseeded, chopped</li> <li>1 cup fresh pineapple, chopped</li> <li>200ml pineapple juice</li> <li>3 tablespoon vegetable oil</li> <li>2 tablespoon rice wine vinegar</li> <li>1 tablespoon soy sauce</li> <li>¼ cup tomato sauce</li> <li>¼ cup brown sugar</li> </ul> <p><strong><span style="text-decoration: underline;">Method</span>:</strong></p> <ol> <li>Heat 2 tablespoons of oil in large wok over medium-high heat. Add prawns and stir-fry for 3 minutes, or until prawns are just cooked through. Remove from wok and set aside.</li> <li>Heat remaining oil in wok. Add onions and cook for 2 to 3 minutes, or until softened. Add chilli and ginger and cook for 2 minutes, then add pineapple, capsicums and carrots. Cook for 1 minute.</li> <li>Add vinegar, tomato sauce, soy sauce, sugar and pineapple juice. Bring to simmer and cook for 7 minutes, or until sauce begins to thicken.</li> <li>Return prawns to pan and toss to warm through and coat. Serve with a side of plain rice.</li> </ol> <p> </p> <p><em>Image: Getty</em></p>

Food & Wine

Placeholder Content Image

Homemade snack eaten by the Queen every day for over nine decades

<p dir="ltr">A former royal chef has revealed that Queen Elizabeth II has been eating one particular snack ever since she was first served it as a child in the royal nursery.</p> <p dir="ltr">Darren McGrady worked for the royal family for almost two decades according to <em>The Sun</em>, and has since revealed some of the Queen’s favourite dishes and frequent requests, including one known as Jam Pennies.</p> <p dir="ltr">McGrady described Jam Pennies as a simple sandwich of “bread and jam with a little butter - usually strawberry jam”, and said the Queen has been eating them every day for 91 years.</p> <p dir="ltr">“We’d make the jam at Balmoral Castle with the gorgeous Scottish strawberries from the gardens,” he said.</p> <p dir="ltr">Meanwhile, another former royal chef has said the Queen is partial to a tuna and mayonnaise sandwich, a popular combination among Brits, but with her own twist.</p> <p dir="ltr">Owen Hodgson told the <em>Telegraph </em>that the monarch prefers hers well-buttered with cucumbers and pepper.</p> <p dir="ltr">Aside from sandwiches, McGrady has shared more insights into Her Majesty’s dining habits, including her insistence on having afternoon tea no matter where in the world she happens to be.</p> <p dir="ltr">The chef recalled one particular instance when he flew to Australia and settled aboard a royal yacht at 5am local time, which was five in the afternoon for the Queen - meaning his first task was to make scones.</p> <p dir="ltr">“In terms of scones - one day plain and one day with raisins folded through,” he said of the Queen’s usual afternoon tea spread.</p> <p dir="ltr">“Also, tiny pastries like raspberry tartlets and a cut cake, honey and cream sponge, fruit cake, banana bread, or her favourite chocolate biscuit cake.</p> <p><span id="docs-internal-guid-173e3f25-7fff-7124-bfda-aae4a4b6d2c9"></span></p> <p dir="ltr">“It would all be washed down with a delightful steaming hot cup of Earl Grey tea.”</p> <p dir="ltr"><em>Image: Getty Images</em></p>

Food & Wine

Placeholder Content Image

Cheesy Taco Pasta

<p dir="ltr">Serve with salsa for a complete Mexi feast!</p> <h3 dir="ltr">Ingredients</h3> <p dir="ltr">500g spiral pasta</p> <p dir="ltr">2 Tbsp olive oil</p> <p dir="ltr">1 red onion, finely diced</p> <p dir="ltr">3 garlic cloves, crushed</p> <p dir="ltr">500g lean beef mince</p> <p dir="ltr">2 tsp dried oregano</p> <p dir="ltr">1 Tbsp smoked paprika</p> <p dir="ltr">8 large tomatoes, finely chopped</p> <p dir="ltr">30g taco seasoning mix</p> <p dir="ltr">1½ cups grated tasty cheese</p> <p dir="ltr">¼ cup finely chopped coriander leaves, plus extra to serve</p> <p dir="ltr">Sour cream, to serve</p> <h3 dir="ltr">Method</h3> <p><span id="docs-internal-guid-c3091b93-7fff-5ab7-9648-78dfcc360204"></span></p> <ol> <li dir="ltr" aria-level="1"> <p dir="ltr" role="presentation">In a large saucepan of boiling salted water, cook pasta following packet instructions. Drain, reserving ½ cup cooking water.</p> </li> <li dir="ltr" aria-level="1"> <p dir="ltr" role="presentation">In a large frying pan, heat oil on medium. Saute onion for 4 mins. Add garlic, cook for 2 mins until fragrant. Add mince and cook for 6 mins until browned, breaking up lumps with a wooden spoon.</p> </li> <li dir="ltr" aria-level="1"> <p dir="ltr" role="presentation">Stir oregano and paprika through. Add tomato and increase heat to high. Cook, covered, 5 mins until tomato has broken down. Add taco seasoning and cook for 1 min.</p> </li> <li dir="ltr" aria-level="1"> <p dir="ltr" role="presentation">Toss pasta and reserved cooking water through mince. Stir cheese through and cook for 2 mins until cheese is melted. Season.</p> </li> <li dir="ltr" aria-level="1"> <p dir="ltr" role="presentation">Stir coriander through and serve with sour cream and extra coriander.</p> </li> </ol> <p> </p> <p><em>Image: Better Homes &amp; Gardens </em></p>

Food & Wine

Placeholder Content Image

Baked eggplant with yogurt

<p>In this delicious dish, grilled slices of eggplant and zucchini are layered with a rich tomato sauce and cumin–flavoured yogurt, then baked. Thick slices of bread and a crisp green salad are the perfect accompaniments to make a satisfying meal.</p> <p><strong><span style="font-family: -apple-system, BlinkMacSystemFont, 'Segoe UI', Roboto, Oxygen, Ubuntu, Cantarell, 'Open Sans', 'Helvetica Neue', sans-serif;">Ingredients</span></strong></p> <div> <div> <ul> <li>3 tablespoons extra virgin olive oil</li> <li>1 red onion, finely chopped</li> <li>2 cloves garlic, finely chopped</li> <li>1 can chopped tomatoes, about 400 g</li> <li>2 teaspoons tomato paste</li> <li>100 ml dry red wine</li> <li>1 bay leaf</li> <li>2 tablespoons chopped fresh parsley</li> <li>salt and pepper</li> <li>3 eggplant, about 700 g in total, cut into 1 cm slices</li> <li>3 zucchini, about 500 g in total, thinly sliced</li> <li>½ teaspoon ground cumin</li> <li>1⅔ cups (410 g) low–fat natural yogurt</li> <li>2 eggs, beaten</li> <li>⅓ cup (35 g) freshly grated parmesan</li> </ul> </div> <div> <h4>Preparation</h4> <div data-url="https://www.readersdigest.com.au/recipes/baked-eggplant-with-yogurt"> </div> <ol> <li>Heat 1 tablespoon of the oil in a saucepan, add the onion and cook for about 8 minutes, or until softened.</li> <li>Add the garlic and cook for a further minute, stirring.</li> <li>Stir in the chopped tomatoes, tomato paste, wine and bay leaf.</li> <li>Cover and simmer gently for 10 minutes.</li> <li>Uncover the pan and let the sauce bubble for a further 10 minutes, or until thickened, stirring occasionally.</li> <li>Remove the bay leaf.</li> <li>Stir in the parsley and season with salt and pepper to taste.</li> <li>While the sauce is simmering, preheat the grill to moderate.</li> <li>Lightly brush the eggplant and zucchini slices with the remaining 2 tablespoons oil.</li> <li>Cook under the grill, in batches, for 3–4 minutes on each side, or until browned and very tender.</li> <li>Preheat the oven to 180°C.</li> <li>Stir the cumin into half of the yogurt.</li> <li>Arrange one–third of the eggplant slices, in one layer, in a large ovenproof dish that is about 2.</li> <li>5 litres capacity.</li> <li>Spoon over half of the tomato sauce.</li> <li>Arrange half of the zucchini slices on top, in one layer, then drizzle with half of the cumin–flavoured yogurt.</li> <li>Repeat the layers, then finish with a layer of the remaining eggplant slices.</li> <li>Mix the remaining 200 g yogurt with the beaten eggs and half of the parmesan.</li> <li>Spoon the yogurt mixture over the eggplant, spreading with the back of the spoon to cover evenly.</li> <li>Sprinkle with the remaining parmesan.</li> <li>Bake for 40–45 minutes, or until the top is lightly browned and set, and the sauce is bubbling.</li> <li>Serve hot, in the baking dish.</li> </ol> <div>Serves: 4</div> <div>Preparation: 20 minutes</div> <div>Cooking: about 1¼ hours</div> <div> </div> <div>This article originally appeared on <a href="https://www.readersdigest.com.au/recipes/baked-eggplant-with-yogurt" target="_blank" rel="noopener">Reader's Digest</a>.</div> </div> </div>

Food & Wine

Placeholder Content Image

Homemade cookies for your pup

<p dir="ltr">Many Aussies are turning to their own kitchens for pet food, with 29% of owners admitting to cooking or making home-made treats for their cats or dogs.</p> <p dir="ltr">While creating bark-uterie boards and pup-cakes continue to grow in popularity, it’s important that owners continue to maintain a balanced and healthy diet for their pet, even when they treat them to a home-made meal!</p> <p dir="ltr">Recipe courtesty of Petstock.</p> <h4 dir="ltr">Dog cookie recipe</h4> <h4 dir="ltr">Ingredients</h4> <ul> <li dir="ltr" aria-level="1"> <p dir="ltr" role="presentation">½ cup wheat flour</p> </li> <li dir="ltr" aria-level="1"> <p dir="ltr" role="presentation">½ cup coconut flour</p> </li> <li dir="ltr" aria-level="1"> <p dir="ltr" role="presentation">2 tablespoons melted coconut oil</p> </li> <li dir="ltr" aria-level="1"> <p dir="ltr" role="presentation">2 eggs</p> </li> <li dir="ltr" aria-level="1"> <p dir="ltr" role="presentation">¾ cup blueberries (optional, halved)</p> </li> </ul> <h3 dir="ltr">Method</h3> <ol> <li dir="ltr" aria-level="1"> <p dir="ltr" role="presentation">Combine flour into mixing bowl</p> </li> <li dir="ltr" aria-level="1"> <p dir="ltr" role="presentation">Add in coconut oil</p> </li> <li dir="ltr" aria-level="1"> <p dir="ltr" role="presentation">Add in eggs</p> </li> <li dir="ltr" aria-level="1"> <p dir="ltr" role="presentation">Combine blueberries</p> </li> <li dir="ltr" aria-level="1"> <p dir="ltr" role="presentation">Roll dough into fist sized balls before rolling dough out onto floured surface</p> </li> <li dir="ltr" aria-level="1"> <p dir="ltr" role="presentation">Cut out cookie dough with doggie cookie cutters</p> </li> <li dir="ltr" aria-level="1"> <p dir="ltr" role="presentation">Place on a baking paper lined oven tray</p> </li> <li dir="ltr" aria-level="1"> <p dir="ltr" role="presentation">Bake for 20 minutes or until golden brown</p> </li> </ol> <p dir="ltr"><strong>Tips:</strong></p> <ul> <li dir="ltr" aria-level="1"> <p dir="ltr" role="presentation">Coconut flour is highly absorbent and can be difficult to work with and roll out, so use plenty of flour on your working surface and rolling pin.</p> </li> <li dir="ltr" aria-level="1"> <p dir="ltr" role="presentation">For grain-free pets, you can use coconut flour only, however you will need to increase the liquids used and add slowly to get the desirable consistency.</p> </li> <li dir="ltr" aria-level="1"> <p dir="ltr" role="presentation">Reduce your baking time slightly to create soft doughy cookies, or lengthen baking time for a crunchier treat.</p> </li> </ul> <p><em>Image: Better Homes &amp; Gardens</em></p> <p> </p>

Family & Pets

Placeholder Content Image

From a series of recipes by Xali: Homemade sushi

<p dir="ltr">This is a great meal to get the family involved. Prepare the ingredients and paté ahead of time and get ready for some hands-on fun! Pecans provide an abundance of organic pyridoxine (vitamin B6), essential for serotonin release and nervous-system health. </p> <p dir="ltr"><strong>Serves: </strong>3</p> <p dir="ltr"><strong>Prep:</strong> 30 mins</p> <p dir="ltr"><strong>Ingredients:</strong></p> <p dir="ltr">Nori seaweed, sheet - 3 whole</p> <p dir="ltr">Sprouts, assorted - 1/2 cup</p> <p dir="ltr">Cucumber julienned - 1/8 whole</p> <p dir="ltr">Avocado sliced - 1/8 whole</p> <p dir="ltr">Tamari to serve - 1/8 cup</p> <p dir="ltr">For the paté Pecans - 3/4 cup</p> <p dir="ltr">Capsicum, red chopped - 1/2 whole</p> <p dir="ltr">Spring onion chopped - 1 1/2 whole</p> <p dir="ltr">Coriander, fresh chopped - 1/8 cup</p> <p dir="ltr">Chilli flakes - 1/8 tsp</p> <p dir="ltr">Salt - 1/8 tsp</p> <p dir="ltr">Cracked black pepper - 1/8 tsp</p> <p dir="ltr"><strong>Method: </strong>For the paté</p> <p dir="ltr">1. Add pecans to the food processor and blitz until they are reduced to a medium crumb. Add the remaining filling ingredients and blend to a chunky pate. Do not over process.</p> <p dir="ltr"><strong>To make 6 rolls</strong></p> <p dir="ltr">2. Place nori sheet with ribbed-side facing upwards, shiny side facing down, and lines in nori perpendicular to you.</p> <p dir="ltr">3. Spread the paté evenly over the sheet leaving the edge furthest away from you free from paté for roughly 1cm as you will use this to secure the roll. Make sure to cover each horizontal edge or you might end up with end pieces without much filling.</p> <p dir="ltr">4. Lay vegetables horizontally in the lower half of the sheet. Start rolling with the edge closest to you. Roll tightly, yet gently away from you. Secure the roll by adding a bit of water to the free edge furthest from you.</p> <p dir="ltr">5. With a sharp knife, cut the roll in half. Slice each half into three or four bite-sized piece.</p> <p><span id="docs-internal-guid-cdcc3960-7fff-ca94-990a-86f7f8a6eda1"></span></p> <p dir="ltr">6. Repeat the process for the remaining ingredients. Slice into rounds and serve with a side of tamari.</p> <p dir="ltr"><em>Image: Supplied</em></p>

Food & Wine

Placeholder Content Image

It's cluckin' back! How to make your own iconic Peking Cluk burger at home

<p dir="ltr">It's sticky, sweet, and packed with the flavour you expect from Peking duck pancakes… only in delicious burger form. </p> <p dir="ltr">From the mind of Dimsimlim and Peking Duk, the burger itself consists of KFC Original Recipe fillets dunked in a hoisin glaze made from – hoisin sauce, honey, plum sauce, and Chinese 5 spice, topped off with cabbage, spring onion, and cucumber slaw giving it that fresh crunchy texture. </p> <p dir="ltr">So, whether you’re craving KFC or Chinese food for dinner, now you can sort yourself the best of both worlds – and the best part? It’s so simple to replicate at home you’ll be marvelling at your own abilities in the kitchen.</p> <p dir="ltr">Don’t forget to share your creations on social media and tag @kfcaustralia, @dimsimlim and @pekingduk. </p> <p dir="ltr"><strong>KFC Peking Cluk Burger Recipe:</strong></p> <p dir="ltr">Serves: 2 Burgers</p> <p dir="ltr">Prep Time: 10 minutes</p> <p dir="ltr"> </p> <p dir="ltr"><strong>Ingredients:</strong></p> <ul> <li dir="ltr" aria-level="1"> <p dir="ltr" role="presentation">2 x KFC Original Recipe Fillets</p> </li> <li dir="ltr" aria-level="1"> <p dir="ltr" role="presentation">2 x Soft White Bread Rolls </p> </li> <li dir="ltr" aria-level="1"> <p dir="ltr" role="presentation">1 x Cup White Cabbage, Shredded</p> </li> <li dir="ltr" aria-level="1"> <p dir="ltr" role="presentation">1 x Spring Onion, Chopped</p> </li> <li dir="ltr" aria-level="1"> <p dir="ltr" role="presentation">½ x Cucumber, Sliced into Thin Strips</p> </li> <li dir="ltr" aria-level="1"> <p dir="ltr" role="presentation">Hoisin Glaze:</p> </li> <li dir="ltr" aria-level="1"> <p dir="ltr" role="presentation">90mL x Hoisin Sauce</p> </li> <li dir="ltr" aria-level="1"> <p dir="ltr" role="presentation">1/8 tsp x Honey</p> </li> <li dir="ltr" aria-level="1"> <p dir="ltr" role="presentation">30mL x Plum Sauce</p> </li> <li dir="ltr" aria-level="1"> <p dir="ltr" role="presentation">1/8 tsp x Five-Spice Powder</p> </li> <li dir="ltr" aria-level="1"> <p dir="ltr" role="presentation">80-100mL x Boiling Water</p> </li> </ul> <p dir="ltr"> </p> <p dir="ltr">Method:</p> <ol> <li dir="ltr" aria-level="1"> <p dir="ltr" role="presentation">Slice the bread rolls into halves.</p> </li> <li dir="ltr" aria-level="1"> <p dir="ltr" role="presentation">In a medium bowl combine cabbage, spring onion and cucumber, then divide mixture in half and place on the bottom of each bread roll.</p> </li> <li dir="ltr" aria-level="1"> <p dir="ltr" role="presentation">In a wok, whisk together Hoisin sauce, plum sauce, honey, five-spice, and boiling water.</p> </li> <li dir="ltr" aria-level="1"> <p dir="ltr" role="presentation">Using tongs, dunk each KFC Original Recipe fillet into the sauce and place on top of the cabbage.</p> </li> <li dir="ltr" aria-level="1"> <p dir="ltr" role="presentation">Place the top of the bread roll on each fillet and serve.</p> </li> </ol> <p dir="ltr"> <strong>Tips: </strong></p> <p><span id="docs-internal-guid-99328be7-7fff-9dfc-dab6-26314949735d"></span></p> <ul> <li dir="ltr" aria-level="1"> <p dir="ltr" role="presentation">Keep fillets warm by placing the KFC fillets box in a 120c oven whilst preparing the Peking Cluk Burger</p> </li> <li dir="ltr" aria-level="1"> <p dir="ltr" role="presentation">Adding the plum sauce and honey gives the glaze gloss and shine</p> </li> <li dir="ltr" aria-level="1"> <p dir="ltr" role="presentation">Boiling water melts the plum sauce and honey whilst warming and thinning the sauce to produce a glaze.</p> </li> <li dir="ltr" aria-level="1"> <p dir="ltr" role="presentation">Any leftover glaze can be stored in the fridge for up to 2 weeks.</p> </li> </ul>

Food & Wine

Our Partners